Thursday, July 28, 2011

Button, Button

So I think you can tell why my nickname is Buttons...I love them! Old ones, new ones, shiny ones, faded ones, simple one, ornate ones. In a forum I can't recall at the moment, another button-phile posed the question about what to do with all those buttons. Any self respecting button lover will have a jar or two or ten of wonderful buttons. But let me share a fun way to show off a few of your lovelies.


Frame 'em! How fun and special my favorite buttons look when shown off in a pretty and petite frame.
First, I picked some frames.

I got these in the dollar section at Michael's. Craft store, dollar store, yard sale even the thrift store are all good places to find small, decorative frames.

Next I dove into my stash of fabric remnants. Those little scraps that are too big for stuffing but too small to make anything. Choose your fabric to go well with your button. You don't want your button getting lost in your fabric pattern.

I cut the fabric to the size of the frame insert and put it in the frame. Then, using a good double-sided tape, I stick the button to the front of the frame.

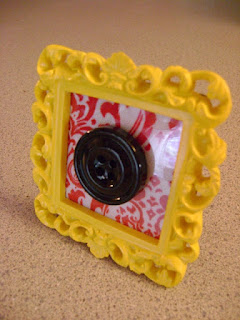
That's it! I get such a fun way to show off those fantastic buttons. I can change them out regularly if I wanted to. it makes a neat little vingette for some extra wall space.


it's just one way to have fun with your collection. I'd love to hear from other button-philes about their display ideas. They're so fun, how can you not?
signature avatar

Monday, July 25, 2011

Measure Twice!...The Little Camper part II

Well, we all know the old saying; measure twice, cut once. What happens if you don't even measure once? You wind up with a sad face.

I know this because I wore one when I realized I had an awesome fabric find that I couldn't use. BOO! So "what had happen wuz", I went into my attic to find more fun fabric to use in my camper makeover. What I found was this adorable, single Waverly curtain  panel (from the thrift store of course).

I was stoked to finally use it and that it originally cost me 1.90! Now, imagine my excitement when I went to thr thrift store found a set of three panels of the SAME pattern for $5.00!!

Too good to be true, right? Right. You see, the fabric is sweet and the buys were a steal but, alas, they are TOO SHORT for my intended windows!!! I got so swept away by the find that I didn't even notice they wouldn't fit. Now don't get me wrong, I'll still find good use for this pretty pattern....but it won't be for camper curtains.

signature avatar

Wednesday, July 13, 2011

The Little Camper that Could

One of our favorite things to do with the kids is to get out the camper, get on the road and find a sweet spot to stay for a few days. RV resort or state park, no matter. We like the time we spend and enjoy taking off with the kids.

On our last trip, I decided it was time for a camper make-over. I knew I wanted to do a country/Texan theme and went in search of themes and ideas in the usual camper forums. Earlier this year I changed the flooring. I bought adhesive faux bois planks and boy what difference! From plain old linoleum to "hardwood floors" the change was really pretty. 
Then I found this pic
of  an adorable red-white-and-blue-camper over at Apple Blossom Dreams. I love it! Now, our camper is a pop-up so I can't change the "walls" because they are actually a vinyl canvas. However, the cabinets, benches and panels are good to go! I dragged Mr. McD down to Lowe's for some paint and painting supplies and got started right away.


It took one weekend and one quart of white paint (well, primer with a bit of white paint stirred in). Here it is still in "raw" form; tape and paper and can, but I can already tell I love it. It does make the camper look a bit brighter and cheery!

In addition to a fresh coat of paint, the camper will get all new backrest cushion covers, seat covers, valances and curtains. Don't you love make-overs?!? The dining table seat cushion covers were easy-peasy! Instead of making full covers and fooling around with a zipper, buttons or some other fasteners, I went for a fitted sheet style cover. There were so many easy "fitted sheet tutorials" on google, I can't even remember which site I went with. But I can tell you it was simple! I used a blue fabric I'd been saving for the camper. It's a sort of faded-denim blue that goes great with my intended theme. Now comes a confession: like my mother before me, I'm a fabric hoarder. I used to scold her for having SO MUCH unused fabric, but now I do the same thing and can't help it! So many pretty colors, so many cool patterns; a project has to be just right for a particular fabric to warrant my cutting into it. But I digress.

These are the remaining two patterns and they're both vintage sheets.

Aren't they adorable? The red and white gingham for a bench seat cover, the pretty striped floral pattern for dining table backrest covers. But look again, do you see that price tag?

Yes, each sheet cost me $1.80 from my favorite store....the thrift store! Now for curtains & valances and we're almost done!

signature avatar